Home Inside a 510 Connector
Inside a 510 Connector
A fairly common problem reported to us is failure to "fire" and/or charge, and this is usually due to a simple connectivity issue which is easily fixed. Most of these connectivity issues have been caused by over-tightening parts together, because many e-cig parts have moveable centre-poles to enable proper connection with the majority of other parts and over-tightening can depress the centre pole in, which then means that it may not make contact properly. The number one rule of using vaping kit is NEVER to over-tighten anything. Just screw on until contact is made, and STOP.
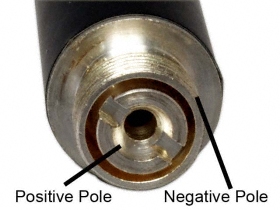
The connection between your e-cig atomiser/cartomiser and battery acts as part of the electrical circuit. The outside of each connector acts as the ground or negative pole of the circuit and the center pin acts as the positive pole. These close-up photos show how contact is made inside a 510 connector and where it can go wrong.
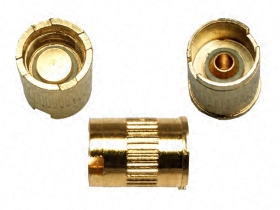 |
Pictured to the left is a basic 510 battery connector. The first image shows the flat part that connects to and touches the centre/positive pin on the tank. You can see the edges of the insulator protecting the centre pin from making contact with the rest of the connector. |
|
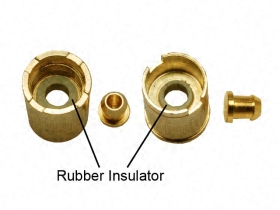
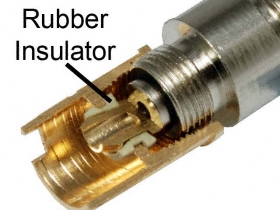
This is the same connector with the center pin removed. You can better see the rubber insulator that prevents the pin from making contact with the rest of the connector.
On the right is the same connector photographed from both sides with the centre pin removed. You can better see the insulator that prevents the pin from making contact with the rest of the connector. |
 |
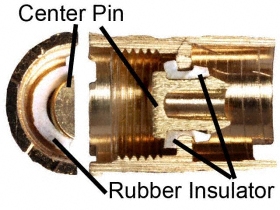 |
On the left is a cross-sectional photo showing both the top and the side views of the 510 connector. You can see the centre pin and how the insulator ring protects the centre pin from making contact with the rest of the connector. You can also see the threads of the connector which is the side the tank screws into. |
| The photo on the right shows a close-up of the connector on an old 510 cartomiser tank. The centre ring is the positive pole and the outside of the carto is the negative pole. A rubber insulator ring separates the two poles as well. Notice the gap between the two. It is sometimes not as apparent when looking at it with the naked eye. |
|
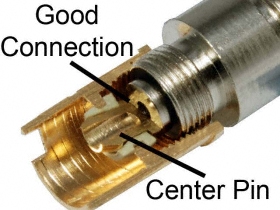 |
On the left we see a cross-sectional photo showing a good connection between battery connector and tank. When a tank is screwed into the connector, the centre pins make a connection for the positive pole of the circuit and the outside of the connector and the carto or atty, essentially the threads of each, make contact with the negative pole of the circuit. |
|
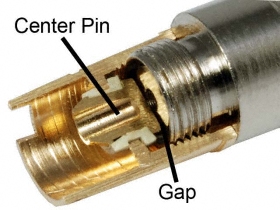
On the right, we can notice there is a gap between the centre pin of the connector and the centre pin of the tank being attached. This lack of contact will prevent the tank from firing. The centre pin height differs between every tank and battery and over tightening a tank with a centre pin that sticks out more than another may cause the connector to be compressed into the ring. This can cause a connectivity issue with other tanks in the future. It is possible on some connectors to adjust the centre pin (see video below).
|
 |
 |
Over tightening of your tank can distort and warp the insulator ring of the battery/device. If this occurs the centre pin may make contact with the outside of the connector creating a short circuit which could damage your tank, device or batteries and cause your device not to function. |
How to adjust your e-cig connectors if they are not making contact properly


